Etching Kit - KD30 - KnifeDogs Brand
Etch Kit - KnifeDogs
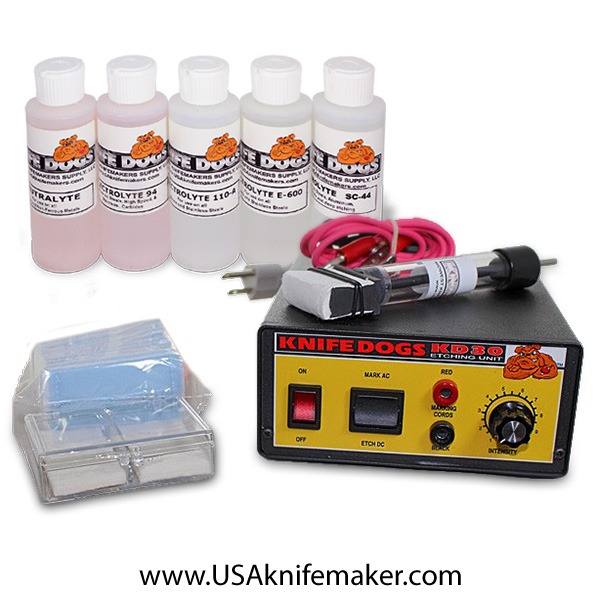
Includes:
- 1 KnifeDogs Power Unit
- 1 Set Power Cords
- Carbon Hand Marker #4650 1/2"x1/2"
- 10 Pack of Deep Etch Pads
- 1 Electrolyte Tray
Sampler of our 4 etching solutions and nuetralizer
- Neutralyte - must have solution...
- Electrolyte 94 - for marking Carbon and HSS Steels
- Electrolyte 110A - for marking all steels including stainless
- Electrolyte E-600 - for marking Stainless Steel
- Electrolyte SC-44 - Multi-use
This kit has everything you need to get started - except the stencil. See below for order a custom stencil. The power unit will mark in both AC (black mark) and DC (deep etch) with a variable power control adjustment.
Quick and dirty how to...
- Clean the knife and tape your stencil using vinyl electrical tape to the knife where you want your mark.
- Clip the Red power lead to your knife and black to the hand marker.
- Attach a deep etch pad to your hand marker.
- Dampen the deep etch pad. Moist but not dripping.
- Power on the unit 1/2 way on AC. (adjust this through trial and error)
- Press the hand marker on top of the stencil. You may hear bubbling. This is normal. Lift the marker off the stencil every 15 seconds to release any gasses so you don't get a "bubble mark". Repeat this 6 times. AC removes metal as the current cycles back and forth 60x every second.
- Switch the power unit to DC. (make sure the stencil doesn't move) and press the hand marker down for another series of 6 times. This leaves a nice black mark in the deep etch.
- Power down. Remove the stencil and using Neutralizer, spray the blade and clean the stencil with this solution. This stops rust or stains from the electrolyte. Clean your stencil with warm water and let dry.
- Admire your work!
You can make your own stencil!
See our stencil making supplies.
You will need to buy:
- A sheet of stencil material (8"x11")
- A quart of developer solution
You will need to make a stencil on your computer and print it out onto clear acetate. (This is available in all office supply and big box stores. It is used for overhead slides.)
You then lay the print out on top of the stencil material, and expose it to strong light for a few minutes. Remove the clear plastic backing on the stencil material and swirl it around in the developer solution for a few minutes.
To be honest, learning how to make a stencil is a slightly more than that but it is a simple process of trial and error. It just takes a little time and practice - like making a knife! See the stencil material ordering page for more.
Ordering a custom stencil:
You can contact IMG of Utica, Inc at 315-735-7591 or FAX 315-732-4262. Patricia will make you a stencil to your exact needs. Generally, there is a one time art charge. This will vary with the amount of work required but it will start around $30 for simple lettering and up. The stencils are done on material that is 2" x 7" and you will get several stencils from one "sheet". You should get hundreds of impressions from one stencil. I find I get 50+ and then move to a new stencil as the screen starts to clog. I like them nice and crisp.