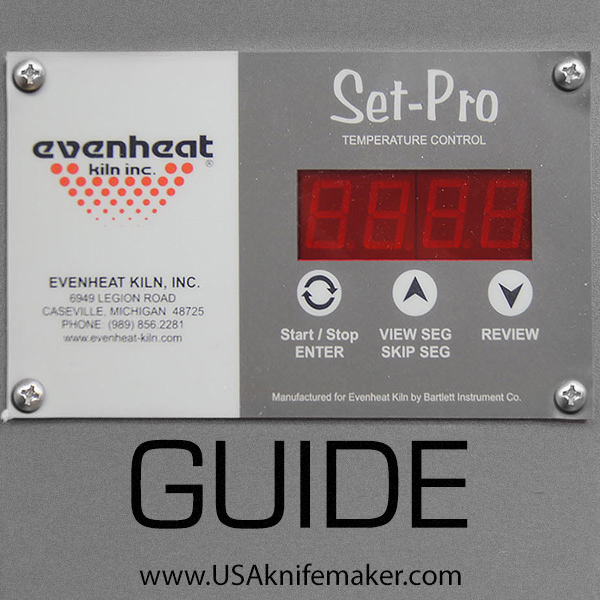
Tutorial - Using the Set-Pro controller example
FIRING INFORMATION
DEVELOPING YOUR PROGRAM
PROGRAMMING THE SET-PRO
Firing requires a kiln to reach certain temperatures at a certain rate of speed. Firing may also require that these temperatures be held or maintained for a certain period of time. The Set-Pro is designed to control these operations automatically. How fast you reach temperatures, the temperatures you want to reach and any soak or holds times at these temperatures is the information you will program into your Set-Pro control.
The big question is.......Where do you find this information?
For starters, Evenheat includes glass firing data from various glass manufacturers in each new kiln. This firing information gives the rates of temperature increases (or decreases), what temperatures you need to achieve for the type of firing you want and any associated soak or hold times that help guarantee success. It's all there. This same firing data is also available on our Technical page. You may also want to check glass manufacturers web sites as most include this information.
Is this firing information easy to use? Yes and no. For those with experience it's quite easy. These folks use it more as a guide than a directive from on-high. For those new to the process it tends to get intimidating and muddled sometimes. The only thing we can say is relax, learn and view this information for what it is: general firing information. It's not etched in stone and you're likely to adjust it at some point. While glass firing is not difficult it does require that you have a basic understanding of the firing process.
Quick note: A grouping of rate of temperature change, the temperature you're going to and any soak/hold time is called a segment. You will program your control with this in mind.
We have chosen to use a Uroboros full fuse, 3/8" thick as our sample program. As we look over the Uroboros firing guidelines we find a table labeled "Activity: Full Fuse". Perfect! Uroboros gives us the temperatures we need to go to, the speed we use to get to these temperatures and the amount of time we should hold or soak at these temperatures. It's everything we're looking for.
| Looking at the table, Uroboros tells us to ramp up at 250°F/hr to 1000°F and soak (hold) for 30 minutes. Note that Uroboros has separated the "Ramp up" operation (250°F/hr to 1000°F) from the "Presoak" (30 minutes) operation. We assume they have done this to offer clarity. For our purposes, we combine the two into one operation. | Segment 1 Firing Information: |
| We are then instructed to ramp up at 250°F/hr to 1450°F and soak (hold) for 45 minutes. This is where the actual fusing process takes place. We have chosen Option 1 from their data which gives us a slower approach to temperature. Uroboros also gives us a +/- sign at our soak time. Hmmm? This means it may be more or less than 45 minutes. Don't fret. The Set-Pro allows you to "bail-out" early or add more time if needed. | Segment 2 Firing Information: |
| Once fusing is accomplished, Uroboros tells us to go "as fast as possible" down to 1000°F and soak (hold) for 60 minutes. This gets us going towards our annealing portion of the firing. Annealing is important as it relieves stresses that could cause the glass to break. The Set-Pro offers a setting called "FULL" which means "as fast as possible". Let's use this. | Segment 3 Firing Information: |
| It's time to anneal. Uroboros tells us to ramp down at 60°F/hr to 800°F with 0 minutes soak (hold) time. This is the actual annealing portion of the firing. | Segment 4 Firing Information: |
| From here, Uroboros instructs us to control the cooling even further. Annealing is completed, but we're being cautious. They offer a ramp down at 120°F/hr to 600°F with 0 soak (hold). | Segment 5 Firing Information: |
| Uroboros continues to want to control the cooling down to something just short of room temperature. For some, this may be overkill, particularly with a brick kiln (brick kilns cool slowly anyway). But, if that's what they want, that's what we're going to do. Uroboros has chosen a temperature of 100°F. We suggest something a little higher. It's possible that room temperature may be over 100°F in some locations (Arizona comes to mind) which means the temperature will never get there. Let's use 200°F instead. So, ramp down at 200°F/hr to 200°F and 0 soak (hold). | Segment 6 Firing Information: |
You have now developed your firing program based on Uroboros firing information. Let's program the Set-Pro!! |
|
| Programming the Set-Pro | |
| 1. Be sure your kiln is plugged in. Throw the power switch located on the red control panel to on. The display will illuminate and read "ErrP". Press the Enter key one time and the display will read kiln temperature along with "Idle". This is telling us that we're not firing and the control is simply waiting. |
|
| 2. Press the Enter Key one time. The display will read USrX (X being the number 1, 2, 3 or 4). The Set-Pro allows you to program and store up to 4 separate programs. At this point, it's asking you which of the 4 programs you want to use. For this example let's use 1. Use the up and down arrows to choose 1. |
|
| 3. Press the Enter key one time. "SEG" along with a number (1 through 8) will appear. The Set-Pro wants to know how many firing segments you wish to use. As we have found out, our sample program requires us to use 6 segments. Use the up and down arrows to choose 6. |
|
| 4. Press the Enter key one time. "rA 1" appears in the display. This is asking for the rate or speed of temperature change needed in segment 1. From the firing information developed above we see a rate for our first segment is 250°F/hr (the Set-Pro always programs rate in degrees per hour). Use the arrow keys to make the display read 250. | |
| 5. Press the Enter key one time. "°F 1" appears in the display. This is asking for the temperature we want to go to in segment 1. Our firing information tells us we want to get to 1000° in segment 1. Use the arrow keys to make the display read 1000. | |
| 6. Press the Enter key one time. "HLd1" appears in the display. This is asking us how long we want to soak or hold at 1000°F in segment 1. Our firing information shows that we don't want to soak at all (0 minutes). Use the arrow keys to make the display read 00.00. | |
| 7. Press the Enter key. "rA 2" appears in the display. Since we have completed putting in the firing information for segment 1 the Set-Pro is now asking us to program the firing information for segment 2. | |
| These programming steps repeat for all remaining segments. You will be asked the same 3 questions (rate, temperature, soak/hold) over and over again until all remaining segments are programmed. It's just that easy. | |
| 8. When you have completed programming all the remaining segments the Set-Pro will display "Redi". This means you're ready to fire. Simply press the Start/Stop key one time to begin the firing. |
|
| The Set-Pro offers a range of "On-the-Fly" features that allow you to add time to a soak/hold, add temperature or skip ahead during the firing process. These features add a great measure of flexibility and come in handy as you develop your firing experience. You will find detailed explanations of these, as well as other fun and interesting stuff, in your users manual or you may view them via our Manuals page by choosing the Set-Pro manual. |
|