Stencil - *Material - Undeveloped -8"x11"
Stencil Material
- Undeveloped for Photo Stencils
- Requires developer sold separately
- 8"x11"
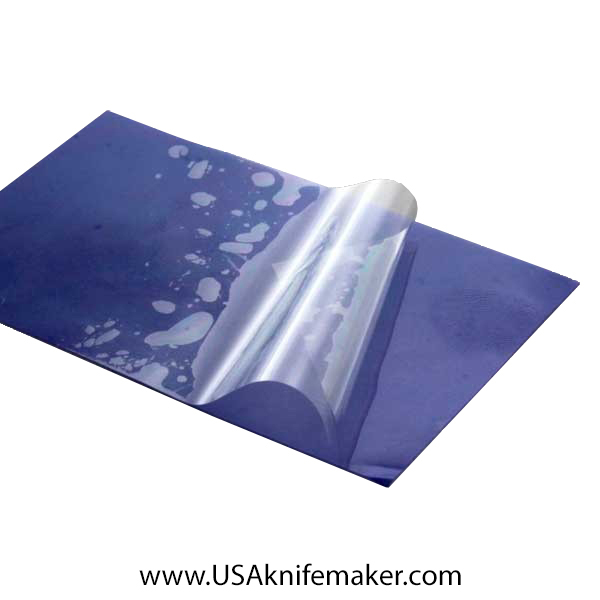
I have taken this picture with a small section of stencil material. Note how there is a plastic film on both sides that will need to be peeled away before you develop the image.
This stencil material is UV sensitive so keep it out of the light. Use this material to make your own stencils.
You can make your own light box or just sandwich this material under glass under your positive image. Here is the basic process:
- Create the image design on your computer.
- Print it out the image on a clear plastic sheet. (This is available from any office supply store. It is used for Overhead projectors.)
- Working under very dim or yellow bug light, cut a small piece of the stencil material and place the image over it.
- Sandwich it under glass. Stencil material, then the image print out, then the glass.
- Expose it to a strong light. Use a timer and keep notes on exposure time.
- Bright light off. Peel off the plastic "liner" on the stencil material.
- Put it into a 50/50 solution of developer. 50% solution, 50% water.
- Swirl it around. After it starts to set, you can use your fingers to rub the stencil to remove it where the light didn't "set" the material to help open the screen.
Rinse in plain water and set aside to dry.
Lot's of tips here:
You have to trial and error your way to repeatable stencil exposure and success. If you are under exposed, all the stencil material will wash away. Exposure to UV hardens or "sets" the material. If underexposed, it washes away in the developer. Like wise, you can over expose and the entire stencil gets hard and your image never comes up in the screen or it clogged.
Avoid very small, delicate patterns in your design. They are very hard to get a good screen from.
Keep your developer a constant temperature to eliminate a variable. I use warm water at around 85F. Don't re-use solution after one session.
When determining exposure time. Start with a hundred watt bulb in keep using the same light set up. Take notes on exposure times that work! I made a light exposure table out of an electrical box and duct tape for a hinge. Keep it low tech and cheap.
Start your first exposure at 5 minutes and develop. If it's too much exposure. Cut it down to 2.5 minutes. Try again. If it's too little, add more light or add 2 minutes. (You have better things to do than wait on an exposure like this so it's better to add more light.)
Keep your stencil material in a dark place (drawer?) in a dark envelope. It will eventually just expire. Use it or loose it. Mine lasts about a year before it's too much work to get a decent stencil from it.
When you get a good exposure time and setup - Write it down! I write the times and temperatures on my light box lid.
Once you get it dialed in, the whole process is very easy and quick. Getting there takes time, practice and patience. Some of you are going to call me and ask why it doesn't work for you or what tips do I have to help you. Read this all again. It really is this simple. A little time and practice will yield you the exact stencils you want at a very low price for each one.